Intro
So now what those who are not familiar with raspberry pi i will tell about this amazing gadget you might not to be a tech-savvy to understand the topic but a bit knowledge about computer is required
What is Raspberry-pi
Raspberry-Pi is credit card sized Computer motherboard Priced around $35 (but in pakistan it costs about RS:6000+ due to shipping and other charges) based on ARM (Click on ARM for more info) designed to do Simple & light tasks as we do on PC.For example
- Coding,Scripting in python,C++,Java e.t.c.
- Making Time Lapses (Raspberry Camera Module Requried)
- Access web via browser (Use Facebook,twitter etc)
- MediaServer for Streaming media on all devices in home.
- We can do lots of DIY-Projects with this(the thing i am lovin).
- Use it as a Web-Server incl(php,Apache).
You Can find more information about this on Raspberry-pi Foundation website www.raspberrypi.org
Setting up Raspberry-pi For use
I told before that pi is only a motherboard with basic components Rigged.You have to set it up for proper use
Things you need
- Raspberry-Pi (i have Model b)
- Micro USB Cable With Power adapter
- A SD Card (4GB Recommended)
- SD Card Reader
- A HDMI Capable Monitor otherwise just hook it into your TV
- A USB Keyboard & Mouse
- An internet Connection
Step 1
Download NOOBS(Raspberry Pi) Opreating system.Go go www.raspberrypi.org
Click on Downloads Section & there Should be many linux distributions listed point to Noobs and click download.

Download should look like this

2ndly Download SD Card Formatter.
Goto
www.sdcard.org Click Download and a drop down menu will appear click on SD formatter for Windows download.

Then Click Accept in new window.
Download should look like this

When Boths Files are downloaded they should look like this

Extract them both You need WinRAR to extract them.After extraction they should look like this.

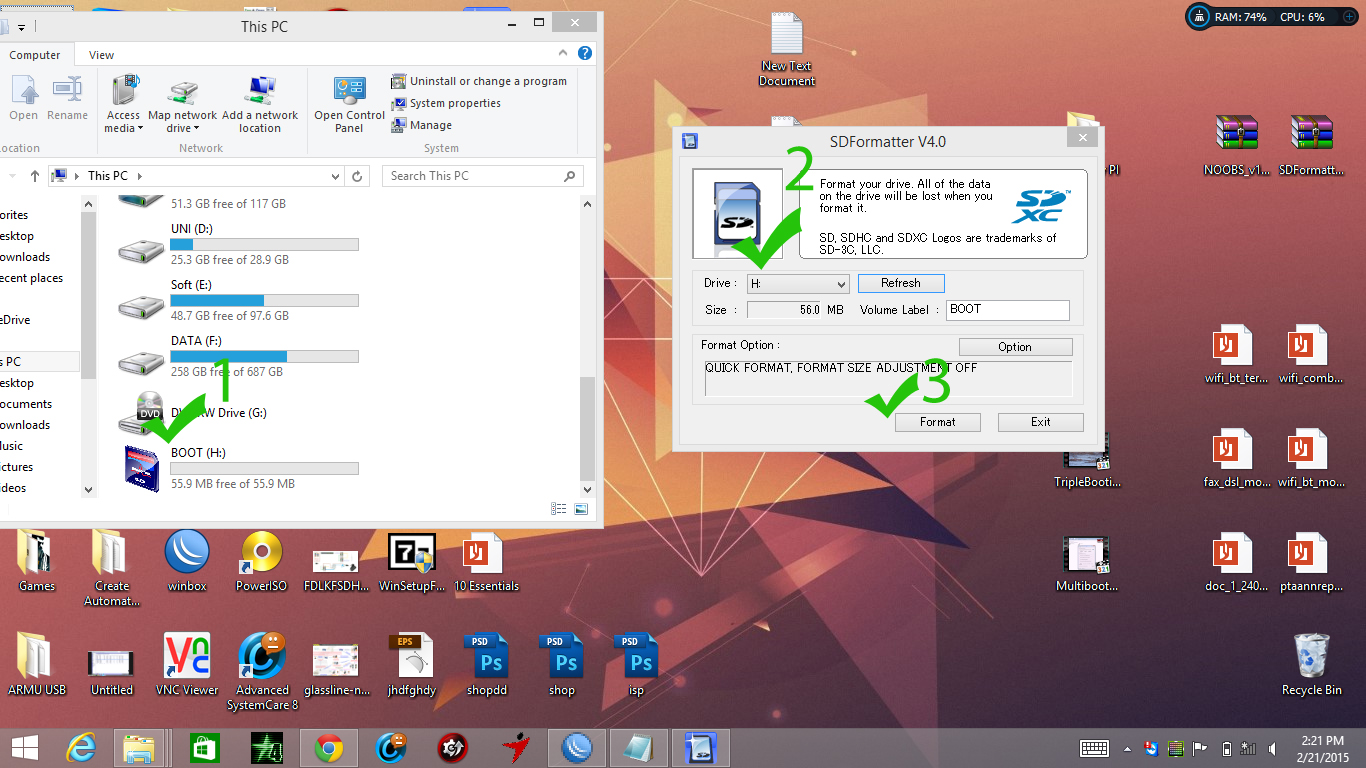
Install SD-Card Formatter.

Run SD-Card Formatter. & format the SD cardy you are going to use with raspberry.
At last Copy all Files From Noobs Folder to SD-Card.

Copying will take a while &should look like this.

Step 2
Things Should Be Rigged like this


Step 3
Insert SD card into Raspberry-Pi then connect to a power source you can use any usb voltage level equal to 5v.I connected my Pi to my Power bank which work great & Pi can run upto 6-7 hours on it in a single charge.Pic given below.
 Step 4
Connect Displayport i connect my Asus Monitor HDMI to Pi & also keyboard,mouse for operation.When everything is rigged connect its power and it will turn on automatically & display should be like this.the first boot-up of raspberry without OS installed.
Follow the steps given in pictures
Select Raspbian(it is a free operating system based on Debian optimized for the Raspberry Pi).

Click yes and then install.
Installation will be started & should look like this.

It will take approximately 45 minutes to install Raspbian on Pi.So Sleep………..:)
At the end a dialog box will appear that OS installed successfully Click OK.
After this Pi will restart & first boot up screen is this.

Step 5
A blue screen will appear you just to follow the steps given in the pictures.
Expand file system enter yes if prompted.
Don’t change the password if pi is not connected to a network or you does not want to access it via network e.g putty.SSH.The default user is pi with the password raspberry.

Point to 3rd option and select boot type.GUI.
At last enter Finish and then yes to reboot.

Configurations” THE FIRST BOOT-UP OF RASPBERRY”
Connect RJ45(ethernet)cable to relevant port to access internet via PI & also to access Pi from network.
You can use internet right now.Point to menu & click internet.

Search anything the default search engine will be duckduckgo.
IT WORKS……
If you have any questions in your mind regarding Raspberry-pi you can Point to this URL or mail me @ ummarkashmiri@gmail.com.
This is a just basic setup of Pi for beginners to setup raspberry pi you can make a Mini-webserver(apache,phpmyadmin.) out of it and also do some dIY hacks with this gadget i have configured raspberry to control my home lights with raspberry(MY HOME SO CALLED SMART HOME)Using 5v relay and using raspberry pi GIPO(general purpose input output).


Thanks….
